6. Automated Settings subGUI
You can configure your settings for automated selection of breathing by SASSI in 3 ways:
-
This option is recommended, if your experimental design meets the criteria of one of our default settings.
Use existing settings files that you previously generated
This option is only available if you have generated a settings file during a previous run.
Derive settings from your recordings
This option can make things much easier, however, the numerical settings for the each of the variables will need to be manually adjusted as these are not automatically updated based on your comments. However, we provide an easy-to-use excel sheet with suggested values for almost any experimental design so you can easily fill in your automated settings.
6.1. Default Settings
Click the
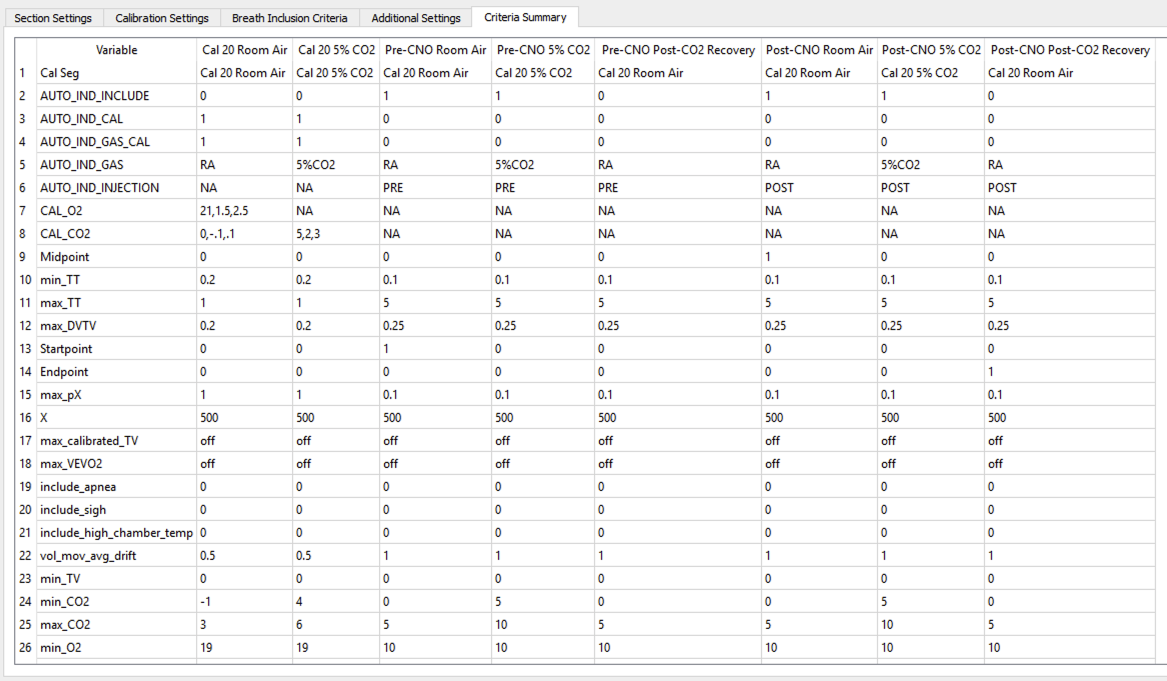
Automated Settingsbutton (6) to open the automated settings subGUI (Figure 10).
Figure 10 Automated settings subGUI summary tab with default settings for CNO injection with 5% hypercapnia challenge.
The settings are divided among five tabs, including a summary table. In each tab the settings are displayed to the left of a Reference panel.
The
?button to the left of each setting’s label will populate the Reference panel with a description of the setting and recommended default values.The
Resetbutton to the right of the setting deletes any changes the user made and reverts the value of that setting to its default value.
Select a default setting from the drop-down menu that matches the experimental conditions represented by the selected signal files (the .txt files).
Make edits if needed.
Save your settings.
Click
Okto save your settings in local memory – the actual csv files detailing the settings won’t be created until SASSI is launched.Click
Save Asto open a file dialog to save your settings in a particular location for access later.Either option of saving will result in a copy of these settings saved in the SASSI output folder for this run once launched.
6.2. Existing Settings Files
Click
Automated Settingsbutton (6) to open the automated settings subGUI.Click
Opento navigate a file dialog to select an existing automated settings file. The tables in each tab will populate with the appropriate settings based on your selection.Select a default setting from the drop-down menu that matches the experimental conditions represented by the selected signal files (the .txt files).
Make edits if needed.
Save your settings.
Click
Okto save your settings in local memory – the actual csv files detailing the settings won’t be created until SASSI is launched.Click
Save Asto open a file dialog to save your settings in a particular location for access later.Either option of saving will result in a copy of these settings saved in the SASSI output folder for this run once launched.
6.3. Derive Settings from Signal Files
Click the
Automated Settingsbutton (6) to open the automated SASSI settings subGUI.Click the
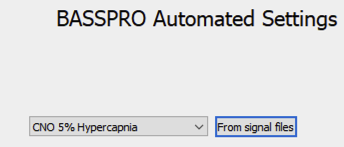
From Signal Filesbutton (Figure 11).
Figure 11 Button to use for generating custom auto settings from signal files.
This process can take anywhere from thirty seconds to several minutes depending on how many signal files you have selected as the process must interrogate each file at every time for new comments.
Review the settings for each of the timestamps extracted.
Timestamps can be renamed in the header column.
If a timestamp was considered unique because of a typo, you can correct the header for that timestamp to match what it was supposed to be. This will allow for typos to be grouped with the intended/ correct condition rather than being a separate condition with a single entry.
Be sure that the settings for gas concentrations match what you need for each condition. These may not be automatically filled correctly. For example, CO2 exposure periods need different requirements for gas concentrations than room air periods. Use the provided table to adjust these settings as needed. You can download this table below.
Click here to download Suggested Settings for Automated Selections
Click
Ok.